
Homemade Gift Box
Supplies Needed:
- Two 9×3″ strips of white cardstock
- One 5×5″ square of white cardstock
- Four 8×0.5″ strips of colored cardstock
- Markers
- Glue
- Scissors
- Ruler
Instructions:
- Fold your large white strip of paper into thirds. Your paper is 9”, so each fold should be at 3”. Fold towards the middle.
2. Repeat this process with the other strip the same size.
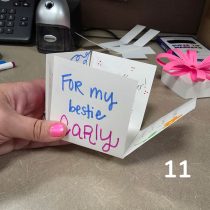
3. Stack the two strips on top of one another to make a plus sign. The middles should align.
4. Glue the middles together.
5. Decorate the squares around the middle with messages for your friend.


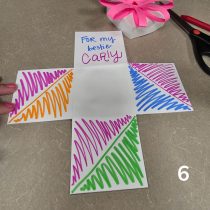
6. Turn your plus sign over and decorate the outside of your box.
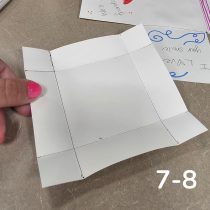
7. Measure and draw a line 1” from the edge around the outside of the square paper.
8. Fold along the lines towards the middle.
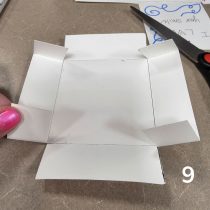
9. Cut two lines on each side as seen in the picture below.
10. Add glue to the backside of the “squares” and attach to the flat strip you just cut. This makes your lid.
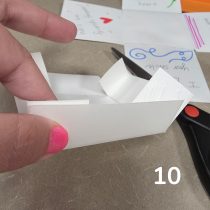
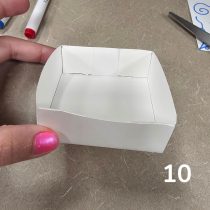
11. Fold up the sides of your box and put the lid on top. You may need your TeamMate to help you hold the box together while adding the lid.
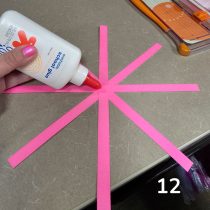
12. For the bow, glue the colored strips together in their middles to look like a snowflake.
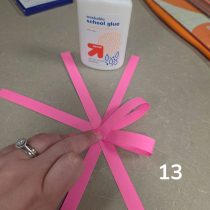
13. Fold each strip into the middle and glue.
14. Glue your bow on top of the box.
15. Add a little surprise in the box and give it to a friend!
