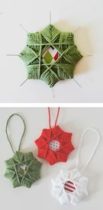
Snowflake Ornaments
Supplies Needed:
- Corrugated cardboard
- Scrapbook paper
- Straight pins
- Yarn
- Glue
- Scissors
- Tape
Instructions:
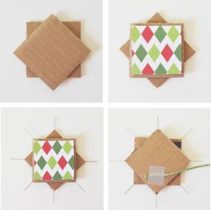
- Using the two 2” x 2” squares of corrugated cardboard, glue one square onto the other in a square-diamond fashion.
- Glue one scrapbook paper square on one side of the cardboard star.
- Push a straight pin halfway into each point of the star (there will be 8 total). You want to push the pins into the corrugated part in between the two outer layers.
- Flip your cardboard over so that the paper side is facing down. Tape one end of your 25 foot length of yarn to the cardboard. Now glue on the other scrapbook paper square, covering up the taped piece of yarn.
5. Turning the star over again so the yarn is on the back side, hold the star in your left hand. With your right hand, take the yarn overtop one pin, then go down 2 pins (following the edge of the square) and going around that pin (a). Then come up behind the pin that is 1 pin up from where you just were and loop the yarn behind and over the top (b).
6. Continue repeating the “2 down, 1 up” pattern, rotating the star counter clockwise as you go.
7. After you have gone around the star once, continue to wrap, laying the yarn to the left of the previously wrapped yarn, so you are moving toward the middle of the ornament with each round.

8. You are finished when there is no more space to move the yarn to the left of the previous round.
9. Pull the yarn to the back side and tape in place. Cut off the excess.
10. Gently push each pin straight into the cardboard until only the tip of the pin is showing.
11. Make a loop with the 4” piece of yarn and tape it to the back of the star for hanging.